
Thursday, October 3, 2013
October Newsletter Take 2
In case that last post was difficult to see, here is the whole newsletter.

October Newsletter
Each week I send home a newsletter to my parents informing them of important events, reminders, and topics that we have learned this week. This not only keeps parents up to date, but it's a great way to keep a record of communication with the parents.
Here is my example of my October newsletter.
Here is my example of my October newsletter.
Tuesday, September 3, 2013
Turning Over a New Leaf
It has been over a year since my last post! I have proven to not be very effective when it comes to writing on my blog, but I am pretty good with creating ideas and implementing them. I'm trying to turn over some new leaves this school year and actually update my blog a little more frequently!
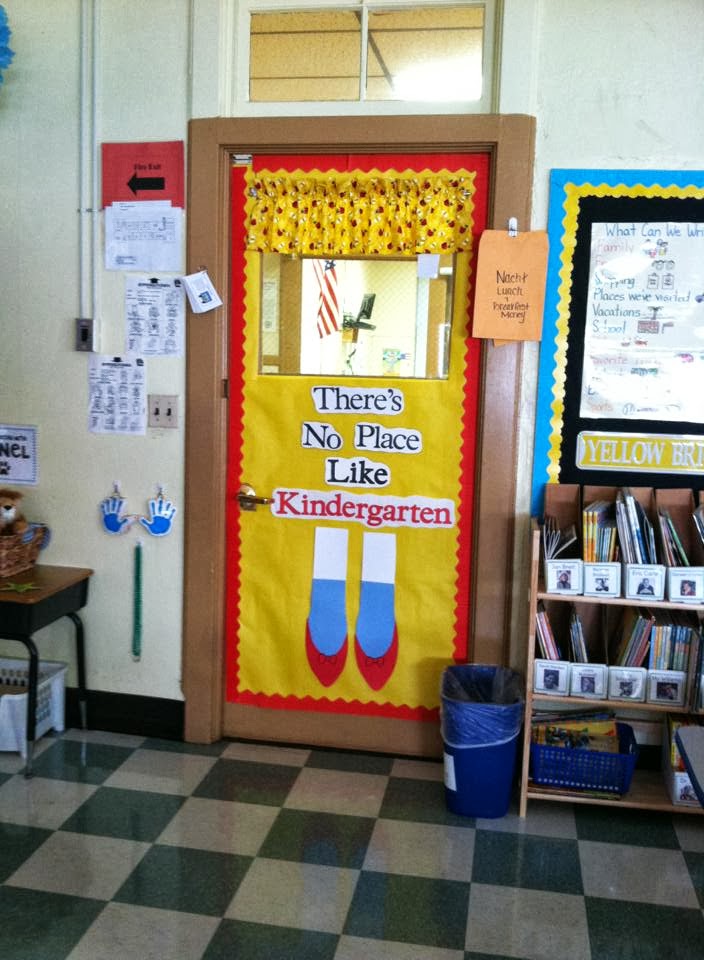
My theme this school year is "Wizard of Oz". Visit the section "Classroom Layout" to view more pictures of my themed room.

My theme this school year is "Wizard of Oz". Visit the section "Classroom Layout" to view more pictures of my themed room.
Friday, July 27, 2012
Pinterest Summer Checklist
Moving a long with my second activity off of my Pinterest Summer Checklist, I managed to check another thing off of my list!

Pinterest Summer Checklist
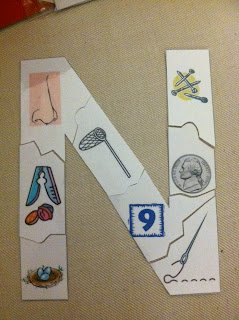
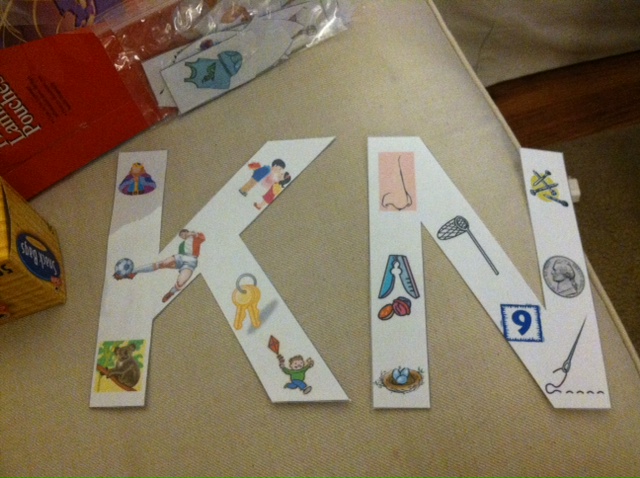
Activity #2- Letter Puzzles
Level of Difficulty: Easy (but you need to be computer savvy)
Activity #2- Letter Puzzles
Level of Difficulty: Easy (but you need to be computer savvy)
This project is easy but it's time consuming, so if you have time to kill or want a project you can keep coming back to- this is it!
This entire project was created in Word. I made with the letters with "Word Art" and one letter on each page. Each letter was 770 in size. After I made the letter the size I want, I used Word's clip art to find pictures. I made sure to set the pictures as "bring to front" so that you can move them around however you want.
After I finished making everything, I printed it and ran it through my mini laminator.
After it was laminated I cut it out, and cut each picture out. I had one of the children I babysit try the puzzle (he is going into Kindergarten in September), I found that making traditional style puzzle pieces (with a bulb shape sticking out) was easiest for him to notice.
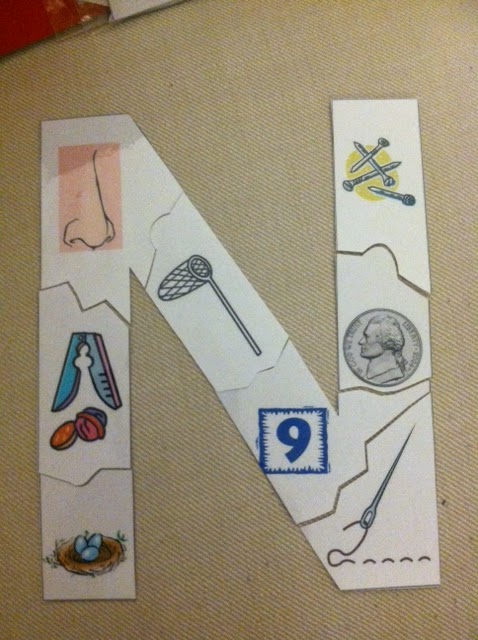
Here it is! The finished product! After I finished I put everything in a ziploc bag. Check 2 off my Pinterest List! Happy Trying!
Wednesday, July 18, 2012
Pinterest Summer Checklist
Like most of you, I'm sure you have a list of "Things You'd Like to Get Done From Pinterest This Summer Before School Starts" List. Well, my list is out the door, and with my 2 grad classes being extremely demanding, it's been hard to have room for fun, but I finally started and got one thing off the list.
Pinterest Summer Checklist
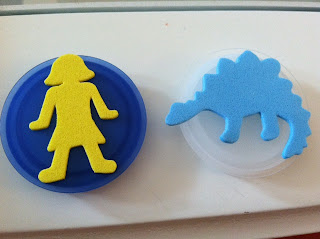
Activity #1- Bottle Cap Stamps
Level of Difficulty: Unbelievably easy!
All you need to do is have extra bottle caps lying around, and foam stickers from the $1 in Target!


Pinterest Summer Checklist
Activity #1- Bottle Cap Stamps
Level of Difficulty: Unbelievably easy!
All you need to do is have extra bottle caps lying around, and foam stickers from the $1 in Target!

You peel off the back and stick it on to the cap! Ta-da! You're finished and you have a nice set of cheap (and recycled) stamps!

Now, some of the stickers are too big for these caps (I just used the ones from water bottles). They might hang over a little bit, but I'm hoping the glue will dry up and it won't be a catastrophe. However, some of the stamps were REALLY big and I found that they worked on much larger caps.

The blue cap is from those gallon jugs of water. Any large flat cap would probably work.
Happy trying!
Tuesday, May 29, 2012
Colorful Writing
The fourth grade team of teachers in my building came up with brilliant writing strategies for their students to use that help them produce fabulous writing. It includes things such as figurative writing, onomatopoeia, effective dialogue, circling back, and synonyms. Seeing the writing that comes from these students having this checklist as their guide was so inspiring, I decided to come up with something for my students.
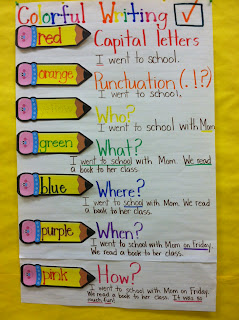
Since I teach Kindergarten, these expectations are a little TOO high at the moment for my kiddies, so I adapted colorful writing in a different way. Below you'll see the poster I created for K-2 students.

In our classroom, we are mostly writing non-fiction (journal writing), and for some students it's a stretch just to get them to write a different sentence every day. I have found this poster to be a source of inspiration and motivation to MY students. I had to add more lines in their journal paper because they were writing so much more than they had been. Once they have completed their journal entry, they go back and underline the different parts of the writing in the appropriate color. Many students are going up to the poster making sure they use all of the colors. This gets their writing to be extremely detailed. "Don't just tell me you're playing soccer, tell me who you were with, where you were, when it happened, and how you felt."
The key to making this work is MODEL, MODEL, MODEL! Without modeling, you might as well not even use it. I show the students an example of how I can include all or most of these colors in one journal entry. After I modeled a few times with my own writing, we went through as a class with their writing. I went through every color and said "okay, with your red crayon, underline ALL of the capital letters." I did this for every color.
As most of you do, I have a wide range of abilities in my classroom. I purposely put capitalization and punctuation at the beginning of the poster. If they don't add details hopefully they are at least using a capital letter and a period. Also, I do not penalize for not underlining. The main purpose of this is so that the children are adding more to their writing.
Upstairs they underline for figurative language and onomatopoeias, but here we are just getting used to going back into our writing to add more.
I'd love to hear from anyone who tries this in their classroom and hear some great feedback!
*By the way, this was not introduced into my classroom until about March. It is up to you when you feel your class is ready to try this, but I strongly encourage you to try TRY TRY!
Sunday, April 22, 2012
Still trying to organize...
There are only 41 or so days of school left in my "first full year" of school, and I am still trying to perfect the organization technique of my room. I swear I'll get it eventually. Because I'm visual and a lister (and my schedule's different every day), I decided to try listing my schedule like so:


I have this skinny wall space right across from my desk, and near our focus walls. I decided to utilize this space and add a splash of color to this corner. All I used was scrap bulletin board paper, a little bit of bulletin board border, strip velcro and laminated index cards. This is a super quick way for us to change our schedule that's different daily. It's also portable. Since it's only on with tape, you can lower it or move it based on your need.
Now, you may notice that there are no times or pictures. For the beginning of the year, I would have pictures next to the words, but sine it's the end of the year, I want my class to rely on using their decoding skills to figure out what the cards say. And honestly, they know what most of them say just by knowing the order of our day. I am not finding the time is necessarily working for me. While I do stay close to the times, sometimes you just need to stray from your time slot- this prevents you from getting stressed about feeling "time restricted". Another plus to not having times is that the students can have this as a job. It's much easier for them to order based on the days that it happens rather than the time. If anyone tries this or finds another way works, I'd love to hear from you!
Subscribe to:
Posts (Atom)